

Smart Pet Feeder Setup Guide: 7 Steps to Get Started
Table of Contents
- What You'll Need Before You Start
- Unboxing and Assembly of Your Smart Pet Feeder
- Downloading the Mobile App and Creating Your Account
- Connecting Your Smart Pet Feeder to WiFi
- Best Practices for Smart Pet Feeder Scheduling
- How to Calibrate Your Automatic Pet Feeder for Accurate Portions
- Smart Pet Feeder Troubleshooting and Common Issues
- Conclusion
Last Updated: August 9, 2026
What You'll Need Before You Start
Setting up a smart pet feeder requires a few essentials before you begin. First, gather the device itself along with its power adapter and any batteries specified in your manual. You'll also need a smartphone with either iOS or Android installed, a stable WiFi network with 2.4GHz support (most smart pet feeders require this band rather than 5GHz), and access to your WiFi password. Having your pet's food on hand is obvious, but also consider keeping the instruction manual nearby, even if you're confident, it contains important calibration information specific to your model.

Beyond hardware, prepare your environment. Choose a location for your smart pet feeder away from direct sunlight, moisture, and high-traffic areas where your pet might knock it over. The spot should be within reasonable WiFi range of your router, typically 20-30 feet for reliable connectivity. If you're setting up a smart pet feeder for the first time, clear about 30 minutes for the entire process. Experienced users often finish in 15 minutes, but the initial setup includes account creation and app configuration, which takes time.
Check that your WiFi network is functioning properly before starting. A weak or unstable connection will cause pairing failures and feeding delays. If you have both 2.4GHz and 5GHz bands enabled on your router (a setup called dual-band), make sure your phone can see and connect to the 2.4GHz network specifically, this is critical because most automatic pet feeder models only support the slower 2.4GHz band.
Unboxing and Assembly of Your Smart Pet Feeder
When you open your smart pet feeder box, you'll find the main hopper unit, a removable food tray, an AC adapter, backup batteries (usually AA or AAA), a desiccant bag to prevent moisture buildup, and printed documentation. Lay all components on a clean, flat surface and verify nothing arrived damaged.

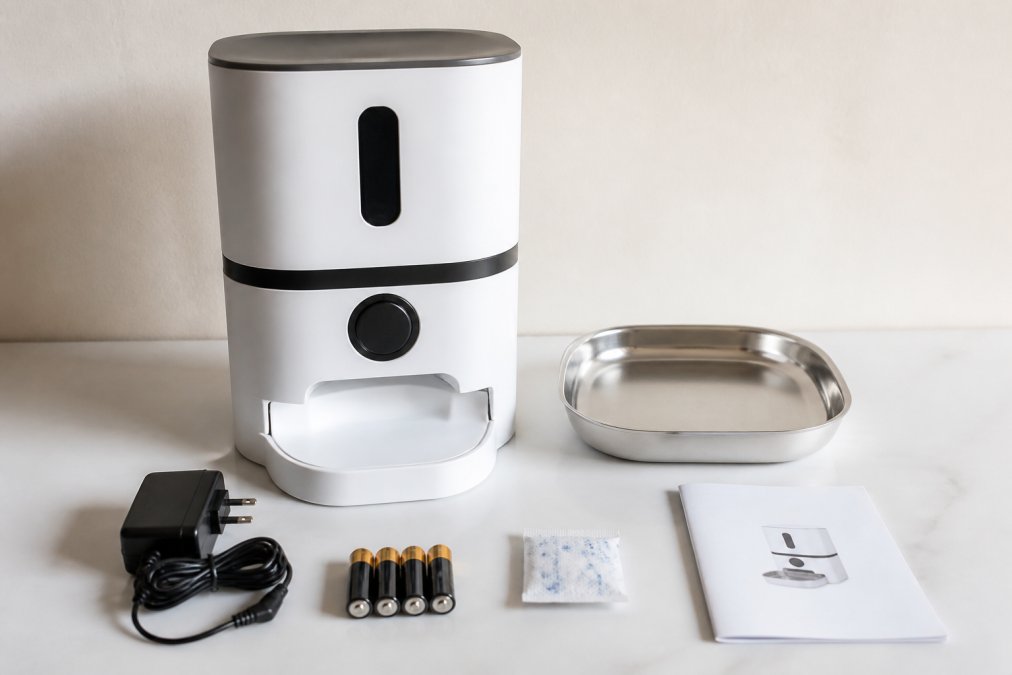
Assembly is straightforward for most models. Attach the food tray to the base unit by aligning the tabs and sliding it into place until you hear a click. Insert the desiccant bag into the hopper, this small packet absorbs moisture and prevents kibble from clumping. If your feeder has a battery compartment separate from the power supply, install the backup batteries now. These ensure your pet gets fed even during power outages. Connect the AC adapter to the device, but don't plug it into the wall outlet yet.
Before powering on, check that the dispensing mechanism moves freely. Gently rotate the portion dial or press the manual override button to confirm the mechanism isn't jammed. This prevents feeding errors once the device is active. Verify the food tray sits flush against the hopper with no gaps where kibble could escape.
Downloading the Mobile App and Creating Your Account
Every smart pet feeder requires a dedicated mobile application to function. Visit your device's app store (Apple App Store for iOS or Google Play Store for Android) and search for your feeder's brand name. Download the official app, avoid third-party versions, which may lack security updates or proper device integration.
Open the app and create an account using your email address. Choose a strong password and save it somewhere secure. Many apps require email verification before you proceed, so check your inbox for a confirmation link. Once verified, log in to the app. You'll see a dashboard where you can add your feeder device.
Select "Add Device" or "Pair New Feeder" from the app menu. The app will prompt you to scan a QR code printed on your feeder's manual or located on the device itself. This QR code links your physical device to your account. If your app doesn't have QR scanning, you'll enter a device ID manually, this is a long alphanumeric code found on the back or bottom of your feeder.
After linking the device, the app will ask for your WiFi credentials. This is where many users encounter their first problem: the app may ask you to temporarily switch your phone's WiFi to a setup network broadcast by the feeder itself. This temporary network (often named something like "Feeder-Setup-123") allows your phone to communicate directly with the device during initial pairing. Once pairing completes, your phone reconnects to your normal WiFi, and the feeder joins your home network.
Connecting Your Smart Pet Feeder to WiFi
WiFi connectivity is the foundation of your smart pet feeder setup. Without it, you lose remote feeding capabilities and scheduling features. Most feeders use 2.4GHz WiFi, which has better range and wall penetration than 5GHz, even though it's slower.
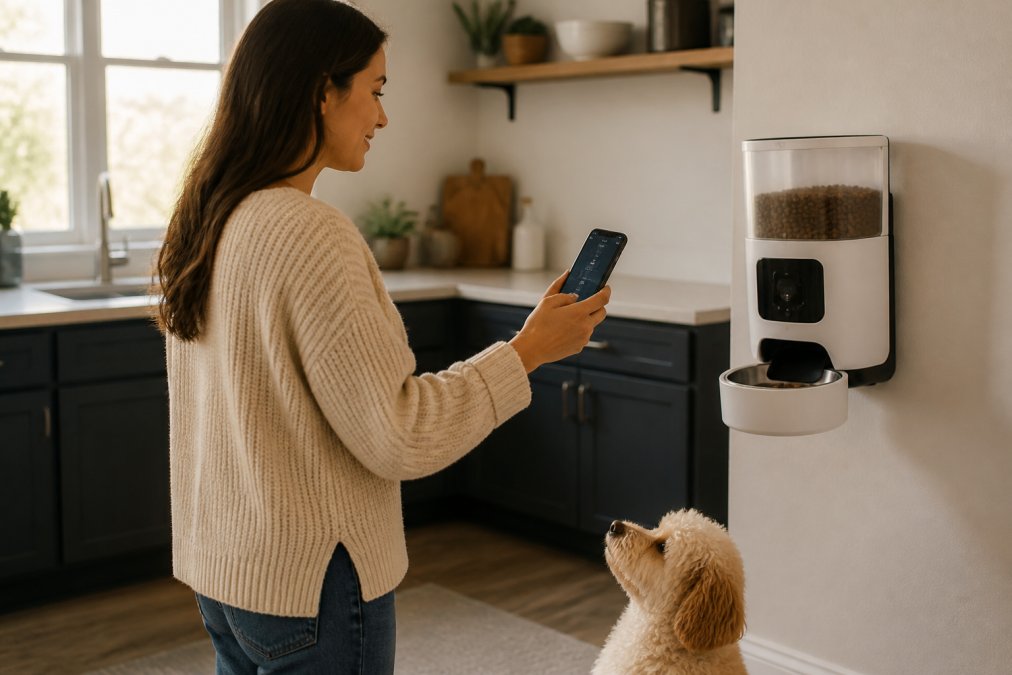
In your app's WiFi settings, select your home network from the available list. Enter your WiFi password carefully, passwords are case-sensitive, and a single typo will cause pairing to fail. If your router broadcasts both 2.4GHz and 5GHz networks with the same name (SSID), your phone might connect to the 5GHz band while the feeder tries to use 2.4GHz. This mismatch prevents pairing. The solution is to temporarily disable 5GHz on your router, complete the pairing, then re-enable it.
Once you enter your WiFi credentials, the feeder will attempt to join your network. The app displays a connecting status, this usually takes 30-60 seconds. Watch for a confirmation message indicating successful connection. Some apps show a signal strength indicator once connected; others simply confirm the pairing is complete.
If pairing fails, the app will show an error code. Common issues include weak WiFi signal, incorrect password entry, or a router that blocks IoT devices. Move your feeder closer to the router temporarily to test signal strength. If the problem persists, check your router's settings to ensure it's not blocking unknown devices or running overly restrictive security filters.
After successful WiFi connection, your feeder will receive a local IP address on your network. This address allows your phone to communicate with the device remotely, even when you're away from home. The app should now display your feeder as "Connected" or "Online" in the main dashboard.
Best Practices for Smart Pet Feeder Scheduling
Creating an effective feeding schedule begins with understanding your pet's nutritional needs and daily routine. Most pets thrive on consistent feeding times, the same times each day create predictability that reduces anxiety. If your pet is accustomed to eating at 8 AM and 6 PM, maintain those times with your smart pet feeder rather than shifting to different hours.
Start with a simple two-meal schedule if your pet isn't currently on one. Many pet parents find that morning and evening feedings align naturally with their own routines. The app allows you to set specific times and portion sizes for each feeding window. Some advanced models let you schedule multiple small meals throughout the day, which can help with weight management and digestion for certain pets.
Consider your pet's activity level and age when setting portions. A young, active dog burns more calories than a senior dog with lower activity. The app usually includes a feeding guide based on your pet's weight and age, use this as a starting point, then adjust based on your pet's body condition over two to three weeks. If your pet seems hungry after meals, increase portions by 5-10%. If weight gain occurs, reduce portions similarly.
Set backup feeding times for emergencies. If you're unexpectedly delayed getting home, the app allows you to trigger a manual feeding remotely. This prevents your pet from going hungry and reduces stress for both you and your pet. Test this feature once during setup so you understand how to use it when needed.
Enable push notifications in the app so you receive alerts when each scheduled feeding occurs. These notifications confirm the feeder is working properly and dispensing food on time. If you stop receiving notifications, it signals a connectivity issue that requires troubleshooting.
How to Calibrate Your Automatic Pet Feeder for Accurate Portions
Portion accuracy directly impacts your pet's weight and health. Most smart pet feeders allow calibration to ensure they dispense exactly what you intend. Begin by measuring a known amount of kibble, typically a quarter cup or half cup depending on your feeder's design. Place this measured amount into the hopper and use the app's calibration feature.
The calibration process usually works like this: you set the app to dispense one portion, then physically measure what actually comes out. If the feeder dispenses more than expected, the app lets you adjust downward. If it dispenses less, adjust upward. Repeat this test three times to ensure consistency. Different kibble sizes affect portion accuracy, so if you switch food brands or types, recalibrate.
The kibble size and shape matter significantly. Larger kibble pieces dispense differently than small kibble. Some feeders have adjustable portion wheels or settings specifically for kibble size. Check your manual for these options and select the setting that matches your pet's food. Using the wrong kibble size setting leads to inaccurate portions and feeding frustration.
Weight-based calibration is more precise than volume-based calibration if your feeder supports it. A digital scale lets you measure exact grams of food dispensed versus what the app claims to dispense. This method catches calibration drift that develops over time as the dispensing mechanism wears slightly.
Test calibration with the actual food your pet eats. Kibble varies between brands and formulations, premium grain-free food has different density than budget kibble. What works perfectly with one brand may be inaccurate with another. If you switch foods, spend a few days observing portions and recalibrating if needed.
Smart Pet Feeder Troubleshooting and Common Issues
WiFi connectivity problems are the most common issue users face. If your feeder shows "Offline" in the app, first check that your home WiFi is working properly by testing it on your phone. Restart your router by unplugging it for 30 seconds, then plugging it back in. Many connectivity issues resolve after a router restart.
If the feeder remains offline after a router restart, move it closer to the router to test signal strength. If it connects when closer, you've identified a range problem. Either move the feeder to a better location or consider a WiFi extender to boost signal in that area of your home.
Factory reset is a last resort for persistent connectivity issues. Most feeders have a reset button on the back or bottom. Holding this button for 10-15 seconds clears all settings and returns the feeder to factory defaults. You'll need to pair it again through the app, so only do this when other troubleshooting hasn't worked.
Feeding errors, when the feeder doesn't dispense at scheduled times, usually stem from connectivity loss or app crashes. Check the app's activity log to see if the feeding was attempted. If the log shows the feeding was triggered but no food dispensed, the mechanism may be jammed. Remove the hopper and manually check for kibble blockages in the dispensing chute. Clear any debris and test the manual override button to confirm smooth operation.
Battery backup issues occur when the feeder switches to battery power during outages. If your feeder has a battery compartment, verify the batteries are installed correctly and aren't depleted. Some models show battery status in the app, check this regularly and replace batteries before they die completely. A dead battery during an outage means your pet won't eat until power returns and you manually feed them.
Error codes displayed in the app or on the feeder's indicator light require checking your manual for the specific code's meaning. Common codes indicate WiFi failure, sensor malfunction, or motor jam. Document the code and consult the manufacturer's support documentation or contact their customer service for guidance.
Setting up a smart pet feeder transforms how you manage your pet's nutrition, especially during busy days or unexpected delays. The process takes just 30 minutes from unboxing to first scheduled feeding. My Store's smart pet feeders are designed with setup simplicity in mind, the H20 1080p Smart Pet Feeder with Camera combines automatic feeding with live video monitoring, letting you confirm your pet ate and see them throughout the day. For a more budget-friendly option, the Cat & Dog Smart Automatic Pet Feeder delivers the same scheduling precision at a lower price point. Both models integrate seamlessly with most home WiFi networks and include backup battery systems to keep your pet fed during power interruptions. Start with the foundational setup steps outlined above, test each feature before relying on automation, and adjust your schedule based on how your pet responds over the first two weeks.
Frequently Asked Questions
How do I connect my smart pet feeder to WiFi?
Most smart pet feeders connect via a 2.4GHz WiFi network. Open the mobile app, select 'Add Device,' and scan the QR code on your feeder. Put the feeder in pairing mode (usually by holding the button for 3-5 seconds until the indicator light blinks), then enter your WiFi password in the app. The device will sync within 30 seconds. If pairing fails, ensure your router is within 15 feet and restart both the feeder and your phone.
Do smart pet feeders work if the internet goes out?
Yes, most quality smart pet feeders have battery backup and manual override features. When WiFi drops, the feeder continues operating on its pre-programmed schedule using the battery backup system. However, you won't receive app notifications or be able to trigger remote feeding. Once internet restores, the device automatically re-syncs. Check your specific model's specifications for battery life, many offer 48-72 hours of backup power.
How do I calibrate a smart pet feeder for accurate portions?
Calibration ensures your feeder dispenses the correct kibble size and portion weight. Start by measuring your pet's current daily food amount in a measuring cup. Enter this into the app and set portion sizes per meal. Run a test cycle without food to check the dispensing mechanism. Fill the tray and run another test, weighing the output. Adjust portion settings if needed until the weight matches your target. Recalibrate monthly or if you switch kibble brands, as different kibble sizes affect portion accuracy.
What should I do if my smart pet feeder keeps showing error codes?
Common error codes usually signal connectivity or mechanical issues. First, try a factory reset by unplugging for 30 seconds and reconnecting. Check that your 2.4GHz WiFi signal is strong near the device, move your router closer if needed. If the error persists, verify the food tray is assembled correctly and the dispensing mechanism isn't clogged. Clean the interior with the included brush to remove kibble dust. If problems continue, consult your manual's troubleshooting section or contact customer support with your error code.
This article was written using GrandRanker