

How to Clean Smart Pet Feeders: A Complete Guide
Table of Contents
- What You'll Need Before You Start
- How to Clean Smart Pet Feeders: Step-by-Step
- Best Cleaning Supplies for Pet Feeders
- Automatic Pet Feeder Maintenance Schedule
- How Often to Wash Your Cat Food Dispenser
- Sanitization vs. Routine Cleaning
- Sensor Maintenance and Desiccant Bag Replacement
- What to Avoid When Cleaning Smart Pet Feeders
Last Updated: August 14, 2026
What You'll Need Before You Start
Gather mild dish soap, warm water, a soft sponge or cloth, a lint-free cloth for drying, and a small soft brush (an old toothbrush works fine) to reach tight spots. Keep paper towels nearby for immediate drying. Before touching anything, unplug your automatic pet feeder from the outlet, residual power can remain even if the feeder appears off. Check your manual to identify which parts are removable and which should never be submerged.

For deep cleaning, have a desiccant bag replacement on hand. These small packets absorb moisture inside the food tank, preventing mold and bacterial growth. We recommend replacing them monthly to maintain hygiene between deeper cleanings.
How to Clean Smart Pet Feeders: Step-by-Step
Cleaning a smart pet feeder follows a logical sequence that protects electronics while removing food residue and bacteria. The process typically takes 20-30 minutes from start to finish.

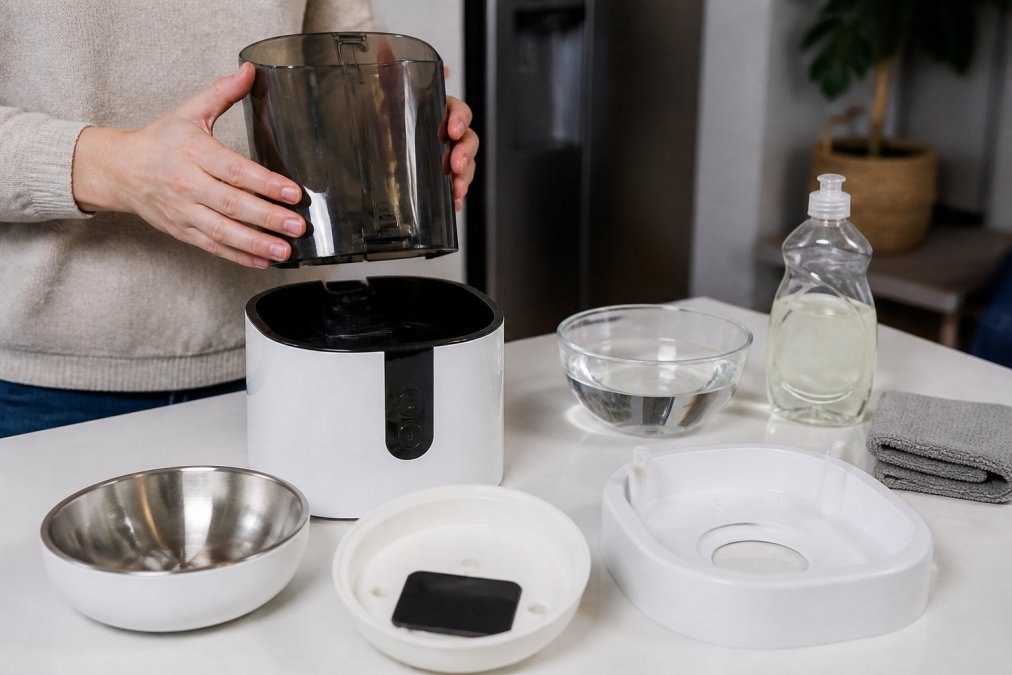
Step 1: Unplug and Disassemble the Feeder Components
Always start by unplugging your automatic pet feeder from the electrical outlet. Wait a few seconds to ensure all power has dissipated. Carefully remove the food tank, stainless steel bowl, and removable tray. Check your manual for any additional removable pieces like the food chute cover or sensor guard. Don't force anything, if a component won't budge, consult the manual rather than risk breaking it.
Step 2: Clean the Food Tank and Lid
Fill a sink with warm water and add a few drops of mild dish soap. Submerge the food tank and lid completely. Use a soft sponge to scrub interior walls, paying special attention to corners where food particles collect. For stubborn residue, soak for 5-10 minutes before scrubbing. Never use abrasive scrubbers or harsh chemicals, which can scratch plastic and create crevices where bacteria hide.
Rinse thoroughly under warm running water until no soap remains. Inspect the interior for remaining food particles or discoloration. If you notice a musty smell or visible mold, soak longer or repeat the cleaning cycle.
Step 3: Clean the Bowl and Removable Tray
Wash the stainless steel bowl or removable tray with warm soapy water and a soft cloth. Check underneath the tray for accumulated food dust and debris. Dry immediately after washing to prevent water spots and bacterial growth. For stubborn staining, soak in warm soapy water for 10-15 minutes before scrubbing. Rinse completely and dry with a lint-free cloth.
Step 4: Clean the Food Chute and Base Unit
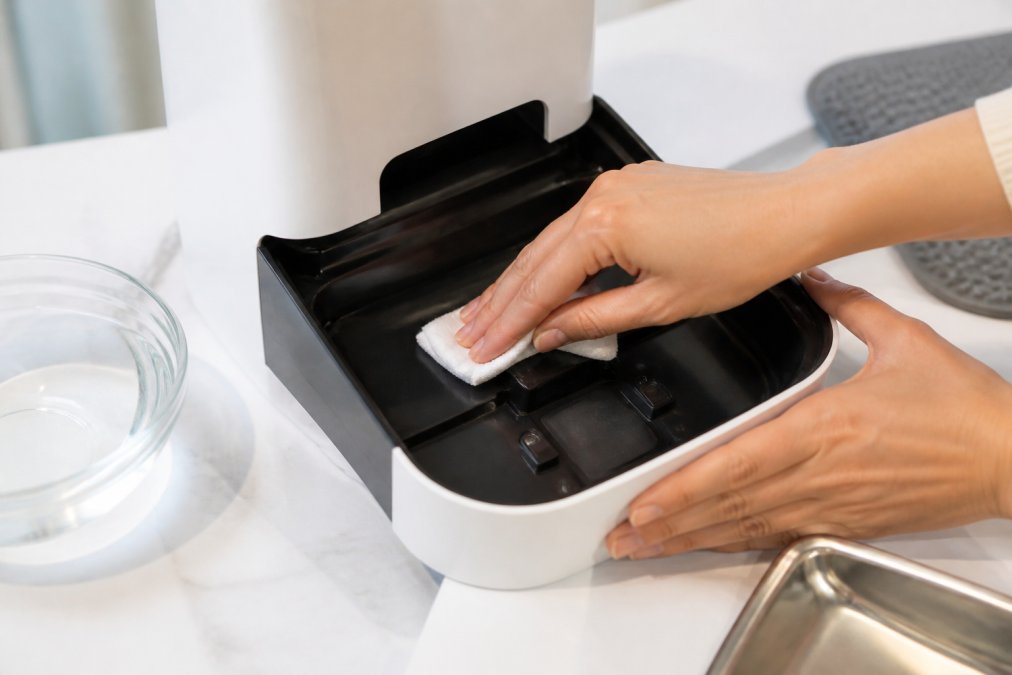
Use a small soft brush to gently brush away loose debris from the food chute. Never insert anything sharp or rigid into the chute. For the base unit, use only a damp cloth with mild soap, never submerge it. Wipe exterior surfaces gently, paying attention to crevices where food dust settles. Clean around the sensor calibration area carefully; any food residue blocking the sensor can cause feeding errors.
Step 5: Dry Components Thoroughly
Pat all components with a lint-free cloth to remove excess water. Air dry all removable parts completely before reassembly, lay them on a clean, dry surface for at least 30 minutes. Stand the food tank and bowl upright so water drains completely. Never reassemble while components are still damp, as moisture trapped inside creates ideal conditions for mold and bacterial growth.
Step 6: Reassemble Your Automatic Pet Feeder
Once all components are completely dry, carefully reassemble your feeder in reverse order. Place the bowl or removable tray back into the base unit, ensuring it aligns properly with the food chute. Reattach the food tank by twisting clockwise or clicking it into place. Replace any lids or covers, ensuring they're secure but not over-tightened.
Before plugging in, visually inspect all connections and ensure no water droplets remain on electrical contacts or the battery compartment. Plug the feeder back in and test a manual feed cycle to ensure everything works correctly.
Best Cleaning Supplies for Pet Feeders
Mild dish soap is the gold standard for cleaning automatic pet feeders, it removes food residue and bacteria without damaging plastic housing or electronic components. Avoid antibacterial soaps, which are unnecessary and can leave residue that contaminates food. Use warm water (never hot, which can warp plastic) and soft sponges and cloths to prevent scratching.
Lint-free cloths are essential for drying; regular towels leave fibers that can enter your pet's food or clog sensors. A soft-bristled brush reaches tight spots without scratching. For stubborn residue, use a plastic scraper rather than metal, which can scratch and create damage. Never use abrasive scrubbers, bleach, vinegar solutions, or commercial degreasers, these damage plastic housing, corrode metal components, and leave chemical residue unsafe for your pet.
We recommend keeping supplies simple: mild soap, warm water, and soft cloths. Complex solutions create more problems than they solve.
Automatic Pet Feeder Maintenance Schedule
Daily maintenance takes two minutes: empty any uneaten food from the bowl at the end of each day, especially food left for more than 8 hours. Weekly maintenance involves a quick visual inspection and light cleaning, check the food chute for blockages, wipe the exterior, and wash the bowl with mild soap and water.
Monthly deep cleaning involves disassembling all removable components and following the full cleaning process outlined above. If you notice mold, musty smells, or feeding errors, clean immediately. Quarterly maintenance includes checking battery compartments, inspecting electrical connections for corrosion, and testing sensor calibration. Replace desiccant bags monthly or whenever they feel damp.
How Often to Wash Your Cat Food Dispenser
Cat food dispensers should be washed at least weekly, though twice weekly is better for cats prone to urinary tract infections or digestive issues. The removable bowl should be washed daily if your cat eats wet food, and at least every other day for dry food. Wet food left in a bowl for more than 4 hours becomes a breeding ground for bacteria.
The food tank and internal components need deep cleaning every two weeks for cat feeders, compared to monthly for dog feeders. Cats are more selective about food freshness, and any staleness or off-smell causes them to refuse meals. Replace desiccant bags every two weeks rather than monthly, cats are particularly sensitive to moisture and mold.
Sanitization vs. Routine Cleaning
Routine cleaning removes visible food residue, dust, and surface bacteria using mild soap and warm water. Sanitization goes deeper, killing bacteria, mold spores, and pathogens that survive routine cleaning. For healthy pets, routine cleaning is usually adequate. However, puppies, senior cats, immunocompromised pets, or those with recent digestive issues benefit from sanitization.
To sanitize, use a dilute bleach solution (one part bleach to ten parts water) by soaking removable components for 10 minutes, then rinsing thoroughly and air drying completely. Alternatively, submerge removable parts in boiling water for 10 minutes, then remove with tongs and air dry. Never use boiling water on plastic housing. Most pet owners should sanitize monthly as part of routine maintenance.
Sensor Maintenance and Desiccant Bag Replacement
The sensor determines portion sizes and feeding schedules. If food residue or dust blocks the sensor, your feeder will dispense incorrect amounts or fail to feed. To clean the sensor, use only a lint-free cloth slightly dampened with warm water. Never spray water directly on it or use any cleaning solution. Gently wipe the sensor lens and surrounding area to remove dust and food particles.
Desiccant bags absorb moisture from the air inside your food tank, preventing mold and bacterial growth. Most last 4-8 weeks before becoming saturated. To replace, locate the bag in your food tank (usually in a corner or attached to the lid), remove the old one, and replace with a new one. Check your desiccant bag monthly by feeling it, if it feels damp or clumpy, replace it immediately. In humid climates, replace every 2-3 weeks instead of monthly.
What to Avoid When Cleaning Smart Pet Feeders
Never put any part of your feeder in a dishwasher, even if labeled "dishwasher safe." High heat and harsh chemicals damage plastic housing, warp seals, and corrode metal components. Never submerge the base unit or any part containing electrical components, water exposure causes corrosion, shorts circuits, and permanent malfunction.
Avoid abrasive scrubbers, steel wool, or harsh scouring pads, which scratch plastic and create crevices where bacteria hide. Never use bleach on plastic components; it can discolor and weaken plastic over time. For sanitizing plastic parts, use boiling water instead. Avoid vinegar solutions, commercial degreasers, and antibacterial soaps, these leave residue that contaminates food or damages housing.
Don't use compressed air to clean internal components; the force can damage delicate mechanisms. Never insert anything rigid or sharp into the food chute, which will damage the internal feed mechanism.
Keeping your automatic pet feeder clean ensures your pet eats fresh, safe food every day while your feeder operates reliably for years. The cleaning process is straightforward and takes minimal time when done regularly. My Store's automatic pet feeders, including the Cat Smart Dog Automatic Pet Feeder and the Automatic Pet Feeder With Camera, feature removable components designed for easy cleaning and maintenance. Start with a weekly cleaning routine, add monthly deep cleaning, and your feeder will deliver years of dependable service while keeping your pet's meals fresh and safe.
Frequently Asked Questions
How often should you clean an automatic pet feeder?
Clean your automatic pet feeder's removable parts (food tank, bowl, tray) at least twice weekly. The food chute and base unit should be wiped down weekly to prevent dry food residue buildup and bacterial growth. If your pet has a sensitive stomach or you notice mold, increase cleaning to daily. For deep sanitization of all components, aim for once monthly.
Can you put automatic pet feeder parts in the dishwasher?
Most automatic pet feeder components should not go in the dishwasher. The plastic housing, stainless steel bowl, and removable tray can warp or be damaged by high heat. Hand wash these parts with mild dish soap and warm water instead. Never submerge electrical components, the base unit, or the battery compartment. Always check your feeder's manual for manufacturer-specific guidance.
What's the best way to clean a smart feeder's sensor?
Unplug the feeder first. Use a soft, lint-free cloth slightly dampened with warm water to gently wipe the sensor area. Never use abrasive scrubbers or harsh chemicals near sensors, as they can damage the electrical components. Allow moisture to evaporate completely before reassembly. If food blockage prevents the sensor from working, clear debris from the food chute carefully and recalibrate the sensor according to your feeder's instructions.
How do I prevent mold and bacterial growth in my pet's feeder?
Mold thrives in moisture, so always air dry all components completely on a clean surface before reassembly. Replace the desiccant bag every 3-6 months to absorb excess moisture inside the food tank. Store dry food in an airtight container rather than in the feeder's tank for extended periods. Clean the food chute weekly to prevent dry food residue from accumulating, and empty any uneaten food from the bowl daily to maintain hygiene and pet health.
This article was written using GrandRanker